One of the great things about PowerShell is that is so extensible and customizable. When sharing my screen with co-workers and customers a frequent exchange happens:
“Oh, what shell are you using?”
“PowerShell.”
“How do you make it look like that? Mine is just blue.”
So let’s go through the different items I’m using to build this PowerShell experience.
- PowerShell 7.1
- Windows Terminal
- NerdFonts
- PowerShell Modules
- poshgit
- PSReadLine beta
- Az.Tools.Predictor
- oh-my-posh
- TerminalIcons
Install a better shell
I’m a big fan of utilizing Chocolatey to install and update Windows applications. Head over to https://chocolatey.org/install and follow the installation instructions to get Chocolatey on your system.
PowerShell 7.1 is my daily driver; it’s been rock solid for me and has significant performance increases over previous versions (especially if you’re coming from Windows PowerShell 5.1). https://devblogs.microsoft.com/powershell/announcing-powershell-7-1/
Windows Terminal is the new, modern terminal application that Microsoft has recently released. It has tons of quality of life improvements such as tabs, fonts, theming, styling, GPU rendering, running multiple shells (like WSL), and more. https://docs.microsoft.com/en-us/windows/terminal/
We’re going to install the applications we need with Chocolatey.
choco install powershell-core, microsoft-windows-terminal
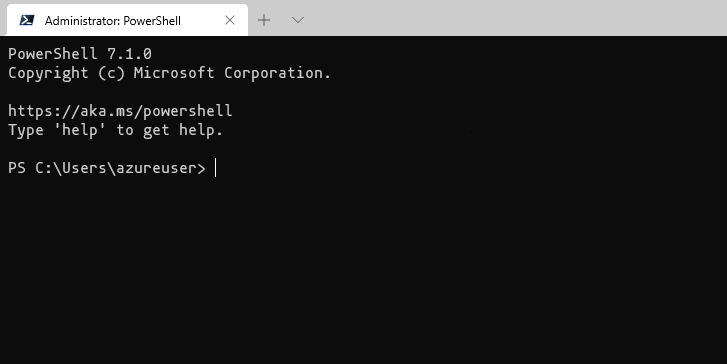
If we start up Windows Terminal, it should default to PowerShell 7.1 and look like a pretty basic shell.

The rest of this article will walk through installing and configuring various modules and tools to improve this experience.
Install posh-git
posh-git is a PowerShell module that integrates Git and PowerShell by providing Git status summary information that can be displayed in the PowerShell prompt, e.g.:

Install the posh-git PowerShell Module using the following:
Install-Module -Name 'posh-git' -Scope 'CurrentUser'
Import the module in your current shell with the following:
Import-Module 'posh-git'
{: .box-warning} You’ll only see the git status integration appear when we are in a git-enabled directory (where a hidden .git directory exists).
Install Terminal-Icons
Terminal-Icons is a PowerShell module that adds file and folder icons when displaying items in the terminal. This relies on the custom fonts provided by Nerd Fonts.
You must be using one of the fonts provided by Nerd Fonts for this module to work as these fonts include tons of custom glyphs/icons that are referenced by their unicode number.
![]()
Install the terminal-icons PowerShell Module using the following:
Install-Module -Name 'terminal-icons' -Scope 'CurrentUser'
Import the module in your current shell with the following:
Import-Module 'terminal-icons'
Install a font from NerdFont
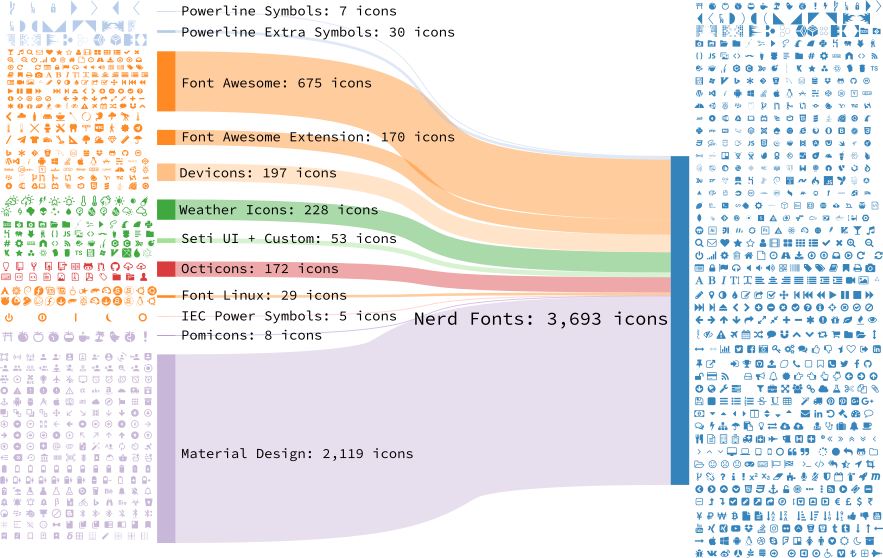
Nerd Fonts patches developer targeted fonts with a high number of glyphs (icons). Specifically to add a high number of extra glyphs from popular ‘iconic fonts’ such as Font Awesome, Devicons, Octicons, and others.

Currently I’m using Mononoki, but choose anything you like from the downloads page: https://www.nerdfonts.com/font-downloads
Download the zip file and extract it’s contents to a directory. I’ve had trouble getting the glyphs/icons to display correctly when trying to use anything other than Regular (i.e., bold, italic, light); so just stick with regular. Right click on the font you want to install and click Install for all users.

We need to configure Windows Terminal to use our new font, but before we can do that we need to find the exact font name to specify. Open Windows 10 Settings > Personalization > Fonts you can search for “mononoki” and see that the actual font name is mononoki NF, this is what we will need for Windows Terminal.
Open Windows Terminal settings, we will have JSON code blocks for each of our Terminal profiles. You should have one for “PowerShell”, add a line for fontFace as below:
{
    "guid": "{574e775e-4f2a-5b96-ac1e-a2962a402336}",
    "hidden": false,
    "name": "PowerShell",
    "source": "Windows.Terminal.PowershellCore",
    "fontFace": "Mononoki NF"
}
{: .box-note} NOTE: Because this file is JSON, the line preceding our new fontFace line will need to have a comma added to the end of the line.
Install oh-my-posh
oh-my-posh is a theme engine for PowerShell inspired from oh-my-zsh on OSX and Linux.
It is also dependant on having a NerdFont installed so glyphs/icons render correctly, and it requires posh-git to be installed for git status integration.
Install the terminal-icons PowerShell Module using the following:
Install-Module -Name 'oh-my-posh' -Scope 'CurrentUser'
Import the module in your current shell with the following:
Import-Module 'oh-my-posh'
There are numerous themes included with oh-my-posh. You can view screenshots of most them on the projects GitHub page here, or just try them out in your shell with Get-Theme and Set-Theme. I’m currently using the theme Powerlevel9k.

You can set your oh-my-posh theme to the same using the following:
Set-Theme 'Powerlevel9k'
Install PSReadLine
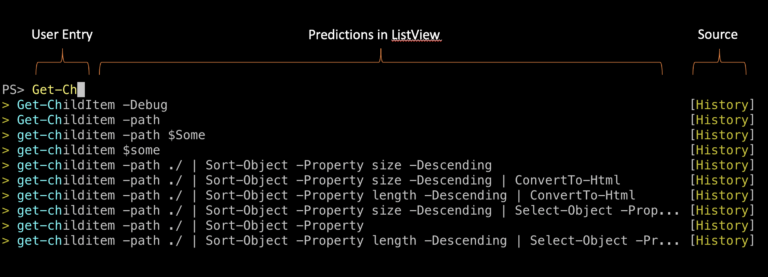
PSReadLine 2.2 (currently in beta) enhances the tab-completion experience by adding predictive suggestions based on your history, and a plugin model that allows other PowerShell modules to suggest cmdlets and switches.
Read more about PSReadLine: https://devblogs.microsoft.com/powershell/announcing-psreadline-2-1-with-predictive-intellisense/

Install the PSReadLine PowerShell Module using the following:
Install-Module -Name 'PSReadLine' -AllowPrerelease -Scope 'CurrentUser' -Force
Import the module in your current shell, and configure its options with the following:
Import-Module 'PSReadLine'

Set-PSReadLineOption -PredictionSource 'HistoryAndPlugin' -PredictionViewStyle 'ListView'
Install Az.Tools.Predictor
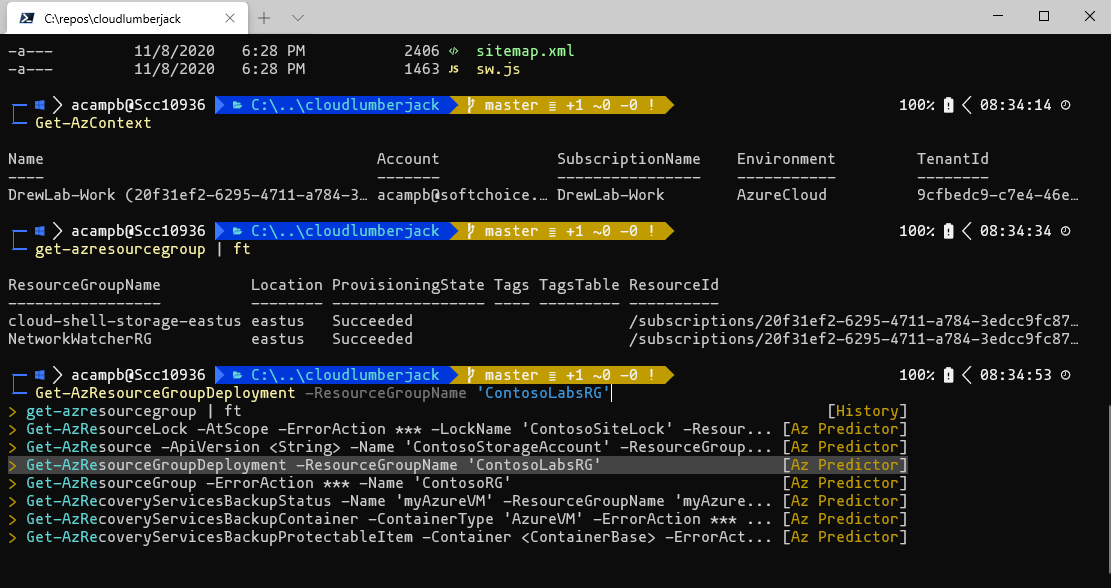
Az.Tools.Predictor is the first PowerShell Module that leverages the new PSReadLine predictive interface to bring suggestions about cmdlets and required parameters. Az Predictor takes the context of the current session into account in its suggestions. With Az Predictor’s context-aware suggestions users will be guided through the discovery of cmdlets and will not need to go to the online help as often.
Read more about Az.Tools.Predictor: https://techcommunity.microsoft.com/t5/azure-tools/announcing-az-predictor/ba-p/1873104

Install the Az.Tools.Predictor PowerShell Module using the following:
Install-Module -Name 'Az.Tools.Predictor' -Scope 'CurrentUser'
Import the module in your current shell, and configure its options with the following:
Import-Module 'Az.Tools.Predictor'
Configure your PowerShell Profile
So far we’ve been manually importing and configuring the various modules manually, the better way to handle this is to configure your PowerShell Profile to configure everything for you when you start a new PowerShell session. A PowerShell profile is a .ps1 script that runs when PowerShell starts. PowerShell supports several profiles for users and host programs. However, it does not create the profiles for you.
If I run $profile from a PowerShell prompt, it will return the path to the profile for that specific host. On my system the path to my profile is C:\Users\acampb\Documents\PowerShell\Microsoft.PowerShell_profile.ps1.
PowerShell supports multiple “hosts” with different PowerShell profiles. We’re not going to do a deep dive one PowerShell hosts here, if you want to read more check out the Microsoft documentation. The one item I have noticed is that your work on PowerShell files using VS Code, and you use the PowerShell extension, when the PowerShell Integrated Console launches it uses a different $profile file path. In order for my PowerShell configuration to be loaded in all hosts we can create a file named profile.ps1 which is always executed.
Create a new file named profile.ps1 in $home\Documents\PowerShell and add the following content. Note these are all the cmdlets we used to import and configure our modules.
Import-Module 'posh-git'
Import-Module 'Terminal-Icons'
Import-Module 'oh-my-posh'
Set-Theme 'Powerlevel9k'
Import-Module 'Az.Tools.Predictor'
Import-Module 'PSReadLine'
Set-PSReadLineOption -PredictionSource 'HistoryAndPlugin' -PredictionViewStyle 'ListView'
Save profile.ps1, close and re-open PowerShell and enjoy your upgraded PowerShell experience!
